Scanner Weaponry: Installing Nessus and OpenVAS
The key to successfully finding and exploiting vulnerabilities in remote systems is all about the amount of information you have in hand. It might sound cliché but the key to getting that information is all about hard work; researching software, hardware and configuration vulnerabilities. You need to dig deep and Try Harder! That being said we can't know all there is to know about everything all the time hehe. To help us out there are a couple of comprehensive vulnerability scanners, two of which we will be installing on Backtrack 5 R2 (Nessus and OpenVAS). However like I said the key is hard work, if you rely solely on vulnerability scanners to do your work for you your certain to miss many interesting and critical security holes.
(1) Nessus
We will start with Nessus which, to my knowledge, is the best vulnerability scanner out there. Nessus isn't included in Backtrack 5 R2 by default so first we need to grab it from the repo's.
root@bt:~# apt-get install nessus

[...snip...]
The following NEW packages will be installed:
  nessus
[...snip...]
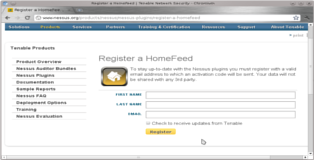
Ok great, now we need a key to activate Nessus. There are two main options here, since we will be using Nessus for private non-commercial use we can get a free “HomeFeed” key. All you need to do is fill out the registry form here.
After filling out the form you will immediately receive you registration key per email. All you need to do is enter it as shown below.
root@bt:~# /opt/nessus/bin/nessus-fetch --register XXXX-XXXX-XXXX-XXXX-XXXX

Your activation code has been registered properly - thank you.
Now fetching the newest plugin set from plugins.nessus.org...
Your Nessus installation is now up-to-date.
If auto_update is set to 'yes' in nessusd.conf, Nessus will
update the plugins by itself.
As you can see above there is a config file that contains allot of options which you should have a look at (though the default settings do the job well enough). Next we need to add a user account for our Nessus install, set that user to be the Nessus admin. When prompted to define rules just hit enter to leave them blank.
root@bt:~# /opt/nessus/sbin/nessus-adduser

Login : b33f
Login password :
Login password (again) :
Do you want this user to be a Nessus 'admin' user ? (can upload plugins, etc...) (y/n) [n]: y

User rules
----------
nessusd has a rules system which allows you to restrict the hosts
that b33f has the right to test. For instance, you may want
him to be able to scan his own host only.

Please see the nessus-adduser manual for the rules syntax

Enter the rules for this user, and enter a BLANK LINE once you are done :
(the user can have an empty rules set)

Login            : b33f
Password         : ***********
This user will have 'admin' privileges within the Nessus server
Rules            :
Is that ok ? (y/n) [y] y
User added
All that remains is starting the Nessus server.
root@bt:~# /etc/init.d/nessusd start

Starting Nessus
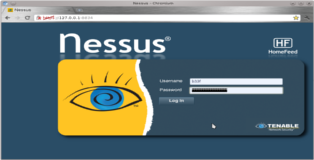
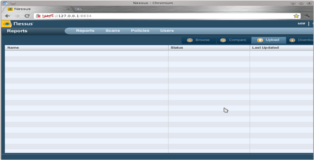
Turning off Nessus works in the same way. You can now open your browser (i'm using chrome but feel free to use firefox), navigate to "https://127.0.0.1:8834/" and log in with your user credentials.
(2) OpenVAS
OpenVAS is another excellent vulnerability scanner. Setting up OpenVAS is a bit of a pain in the ass but it is well worth the effort. Navigate to the directory shown below, there is a script there ("openvas-check-setup") which is particularly useful for troubleshooting you installation if something goes wrong. First we will need to generate a SSL certificate for OpenVAS (even if we won't use it).
root@bt:~# cd /pentest/misc/openvas/

root@bt:/pentest/misc/openvas# openvas-mkcert
The following files were created:

. Certification authority:
   Certificate = /usr/local/var/lib/openvas/CA/cacert.pem
   Private key = /usr/local/var/lib/openvas/private/CA/cakey.pem

. OpenVAS Server :
    Certificate = /usr/local/var/lib/openvas/CA/servercert.pem
    Private key = /usr/local/var/lib/openvas/private/CA/serverkey.pem

Press [ENTER] to exit
Next we are going to have OpenVAS grab the latest NVT's these are like vulnerability signature files that OpenVAS uses.
root@bt:/pentest/misc/openvas# openvas-nvt-sync

[...snip...]
[i] Download complete
[i] Checking dir: ok
[i] Checking MD5 checksum: ok
Now generate the client certificate and rebuild the database.
root@bt:/pentest/misc/openvas# openvas-mkcert-client -n om -i

root@bt:/pentest/misc/openvas# openvasmd --rebuild
Start the scanner to load all the newly downloaded NVT's into the database (may take some time), rebuild the database and back it up.
root@bt:/pentest/misc/openvas# openvassd

[...snip...]
All plugins loaded

root@bt:/pentest/misc/openvas# openvasmd --rebuild

root@bt:/pentest/misc/openvas# openvasmd --backup
Configure an administrative user to interact with the OpenVAS scanner.
root@bt:/pentest/misc/openvas# openvasad -c 'add_user' -n openvasadmin -r Admin
Configure an administrative user to interact with the OpenVAS scanner.
root@bt:/pentest/misc/openvas# openvasad -c 'add_user' -n openvasadmin -r Admin
Configure the ports that OpenVAS will use and start the web-GUI frontend for the scanner.
root@bt:/pentest/misc/openvas# openvasmd -p 9390 -a 127.0.0.1

root@bt:/pentest/misc/openvas# openvasad -a 127.0.0.1 -p 9393

root@bt:/pentest/misc/openvas# gsad --http-only --listen=127.0.0.1 -p 9392
Finally add a regular user account. This is important, after entering the desired login you will be prompted for “Authentication (pass/cert)” leave this blank and just hit enter, you will then be asked to set a “Login password”. When asked to define rules for the user leave it blank by hitting CTRL-D.
root@bt:/pentest/misc/openvas# openvas-adduser

Using /var/tmp as a temporary file holder.

Add a new openvassd user
---------------------------------

Login : b33f
Authentication (pass/cert) [pass] :
Login password :
Login password (again) :

User rules
---------------
openvassd has a rules system which allows you to restrict the hosts that b33f has the right to test.
For instance, you may want him to be able to scan his own host only.

Please see the openvas-adduser(8) man page for the rules syntax.

Enter the rules for this user, and hit ctrl-D once you are done:
(the user can have an empty rules set)

Login             : b33f
Password          : ***********

Rules             :

Is that ok? (y/n) [y] y
user added.
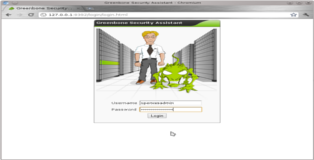
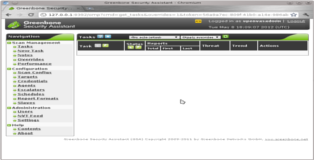
All done, you can now open your browser and point it at "http://127.0.0.1:9392/" and you will be presented with the Greenbone Security Assistant frontend for OpenVAS.
There is one more thing I should mention. If you reboot and want to start OpenVAS again it is a bit tedious since it requires quite a few commands. For your (and my) convenience I poured these commands into a small shellscript which you can download below. The script will update NVT's, rebuild the database and start the web frontend.
Download: OpenVAS.sh

